KID FRIENDLY CHICKEN MASALA

 This is one recipe the babies/children in our family have eaten and have been eating for a long long time. (adjusting the spices) We all love it and it tastes so good on the side with dal/rice, curd rice and sometimes we even eat it with rasam/rice :)

Easy to make and its sure to be a big hit with your fussy toddler!!

This is the first recipe I learnt while starting to cook.............so beginners...this one's for you!:)


INGREDIENTS:
1/2 a chicken (about 7 pieces)
1 big onion, diced
1 tomato, chopped
1 tbsp ginger garlic paste
4 tbsps tomato puree
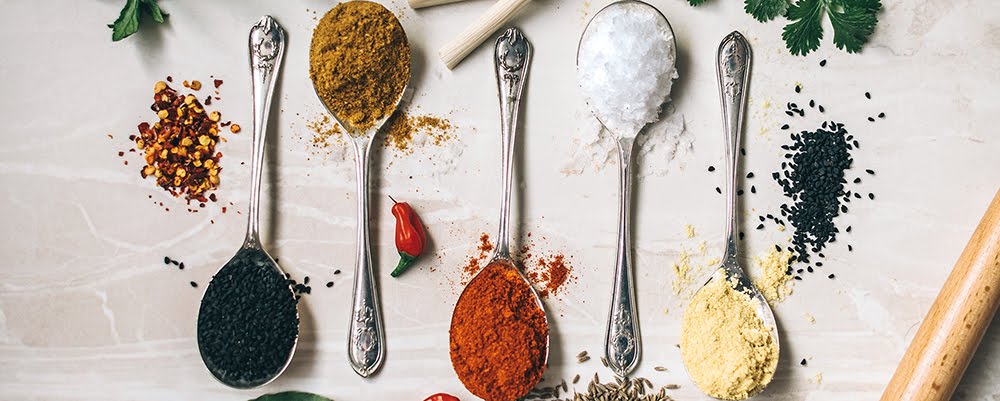
1/2 tsp garam masala
1/4 tsp cumin powder
1/4 tsp turmeric powder
3/4 tsp coriander powder
1/4 tsp chilli powder
water to cook the chicken (approx 1 to 1.5 cups)
mint/ fresh coriander leaves- handful
1 tbsp ghee/butter
oil
salt

PROCESS:
  • In a pressure cooker or a wok heat the ghee
  • Add the onions and saute till they turn slightly brown. Add some oil for easy stirring
  • Add the ginger garlic paste and stir for a minute and then add the tomatoes
  • Stir and poke on the tomatoes so that they soften and break. stir for about 2 minutes.
  • Add the chicken. stir
  • Add the spices and stir. add salt to taste.
  • Add the tomato puree and give it a good stir.
  • Add the mint/ coriander leaves and enough water to cook the chicken

  • close the pressure cooker and cook for about 3 whistles. switch off flame
  • after the  pressure cooker has cooled off, open to check if there is still water. If there is just cook over the flame till the water disappears.
  • Add the chicken

FRUIT AND SAGO PAYASAM

This is an interesting way to eat sago payasam. I first ate this dessert at my sisters inlaws place. It was an extremely new dish to me and immediately asked her for the recipe :)

I completely forgot to take pictures....remembered to take pictures only the next day when there was only 1 bowl left :( Will update the post with better pics next time I make it....which will be very soon :D


INGREDIENTS:
1/2 cup sago/ javarisi
water to boil the sago
2 cups water (approx)
4 heaped tbsps milk powder
2 tbsps sugar
1 tsp vanilla essence
1 small tin fruit cocktail(in syrup)

PROCESS:
  • Boil the sago in water till it turns transparent. drain and set aside
  • In a saucepan, heat 2 cups of the water (save one cup for later). Add the milk powder and simmer. stir and add the sugar.
  • Add the boiled sago and simmer for a few minutes till the sago blends with the milk.
  • Add the required amount of syrup from the fruit tin and adjust the sweetness.
  • If the dessert has become too thick add milk to bring it to the desired consistency.
  • switch off the flame. Add the vanilla essence.
  • when the dessert has cooled a bit add the drained fruits.
  • serve chilled


notes:
  • instead of milk powder you can use carnation milk or milk maid accordingly to enhance the taste .
  • you can even use plain milk.

KATHIRIKAI PACHADI/ BRINJAL DIP - A FAMOUS ACCOMPANIMENT FOR YOUR BIRYANI DISHES


This is most famously made as an accompaniment for Biryani. Its a very typical south Indian dish. Its simple and delicious. Its slightly sweet slightly spicy and slightly sour! :D

I usually make it along with vegetable Biryani or chicken Biryani at home. The recipes can be viewed here and here respectively.  The vegetable biryani is a rice cooker version so its super easy and quick once you have all the veggies cut and ready.


INGREDIENTS:
brinjal - 2 big
mustard seeds - 1/2 tsp
dried red chilly, broken into two - 1
cardamom - 1
cloves - 3
cinnamon - thin 2 inch piece
ginger garlic paste - 1 tsp
curry leaves - 10
onion, sliced - 1
garlic, peeled and sliced thin - 4 cloves
tomato, chopped - 1/2
green chilies, slit - 1
chili powder - 1/2 tsp
cumin powder - 1/2 tsp
fish curry masala - 1 tbsp
tamarind - 1 tbsp soaked in 1/2 cup hot water and then extract the juice.
tomato puree - 1 tbsp
white vinegar - 1 tbsp
sugar - 1 to 2 tbsp depending on your taste
salt to taste


PROCESS:
  • Cut the brinjals into wedges and slightly mix with a bit of salt. deep fry them till slightly browned. Drain them on a kitchen towel. keep aside
  • In a wok, heat about 4 tbsps of oil. Add the mustard seeds. After they start popping, Add the cinnamon, cloves , cardamom
  • Add the dried chilly and the curry leaves.
  • Add the onions and fry till slightly brown. Add the ginger garlic paste and saute for a few more seconds till the raw smell leaves.
  • Add the sliced garlic and green chilies. 
  • Add the chilli powder , cumin powder and the fish curry powder. saute for 30 seconds.
  • Add the tomato and close and cook for a few minutes till it becomes mushy.
  • Add the fried brinjal and some salt.
  • Add the tamarind water and let it simmer.
  • When the water level has gone down a bit, add the tomato puree vinegar and sugar. mix well.
  • Add more water if need be to get the consistency required.

RED VELVET CAKE


 We celebrated our wedding anniversary last month with this beautiful (well ...almost!) rose cake. The cake tasted really good except that the frosting way wayyyy to sweet for us!! But I picked this frosting coz buttercream frosting is said to give sharper roses! I even reduced the sugar in the cake to 3/4 cup. The original recipes uses 1.5 cups.

I was so excited to make this cake after I saw this on priyas blog. She was helpful enough to clear a few of my never ending doubts... The piping does look a bit tricky, does'nt it? well.....I practiced a few roses on a tray first and then started on the cake( phew!!)

I followed the recipe for the red velvet cakes from joy of baking and followed the frosting from priyas page. 


I was a bit disappointed with the outcome of the cake! Speaking from experience........one big advise......please do not proceed with the piping without a wilton 1M nozzle!!.......I couldnt find one anywhere here so I thought any wide flower shaped nozzle would do!!.............
            
End result: the roses ended up looking like murukkus! yeah yeah!.......laugh all u want...hmphh!


 INGREDIENTS:
for the cake: 
2 1/2 cups (250 grams) sifted cake flour
1/2 teaspoon salt
2 tablespoons (15 grams) regular or Dutch-processed cocoa powder
1/2 cup (113 grams) unsalted butter, room temperature
3/4 cup granulated white sugar
2 large eggs
1 teaspoon pure vanilla extract
1 cup (240 ml) buttermilk
2 tablespoons liquid red food coloring
1 teaspoon white distilled vinegar
1 teaspoon baking soda


for the buttercream frosting:
4 cups icing sugar, sifted
1 1/4 cups unsalted butter, room temp
1 tbsp vanilla extract
1/4 tsp salt
4-5 tbsps milk

PROCESS:
  • Preheat oven to 350 degrees F (175 degrees C) and place rack in center of oven. Butter two - 9 inch (23 cm) round cake pans and line the bottoms of the pans with parchment paper. Set aside.
  •  In a mixing bowl sift together the flour, salt, and cocoa powder. Set aside.
  • In bowl of your electric mixer, or with a hand mixer, beat the butter until soft (about 1-2 minutes). Add the sugar and beat until light and fluffy (about 2-3 minutes). Add the eggs, one at a time, beating well after each addition. Scrape down  the sides of the bowl. Add the vanilla extract and beat until combined.
  • In a measuring cup whisk the buttermilk with the red food coloring. With the mixer on low speed, alternately add the flour mixture and buttermilk to the butter mixture, in three additions, beginning and ending with the flour.


  • In a small cup combine the vinegar and baking soda. Allow the mixture to fizz and then quickly fold into the cake batter.
  • Working quickly, divide the batter evenly between the two prepared pans and smooth the tops with an offset spatula or the back of a spoon. Bake in the preheated oven for approximately 25 - 30 minutes, or until a toothpick inserted in the center of the cakes comes out clean. Cool the cakes in their pans on a wire rack for 10 minutes. Place a wire rack on top of the cake pan and invert, lifting off the pan. Once the cakes have completely cooled, wrap in plastic and place the cake layers in the refrigerator for at least an hour (or overnight like I did). (This is done to make filling and frosting the cakes easier


for the frosting:
  • beat the butter on high until pale and fluffy.
  • Add the icing sugar little by little beating well for 3 mins after every addition.
  • Add the vanilla and salt and beat until combined
  • Add milk little by little as required to make the frosting easily spreadable/ easy to pipe the roses
  • Fill the piping bag with the frosting with the wilton 1M tip intact .

PUTTING THE CAKE TOGETHER:
  • Place the first cake on a cake base. Put a dollop of frosting and level it evenly with a spatula.
  • Place the 2 nd cake on top. Repeat the frosting on top and sides of the cake. Refrigerate the cake for about 30 mins.
  • Start piping the roses on the cake, You can watch a tutorial on how to pipe the roses here

GARLIC KNOTS


This is probably one of the first things I started making with yeast. I've definitely come a long way since. Hence this recipe needed a big upgrade.

Aaliya who is a big garlic fan loves it when I make these garlic knots. She goes one step ahead and melts some cheese over hers everytime.


There is something relaxing and satisfying when working with yeast and making bread. The waiting part for proofing I agree is boring. But once the dough is ready, the shaping and designing is exciting and wonderful!
These rolls are absolutely soft and springy .............and how satisfying it is when you give your family something without bakery stabilizers, margarine  etc.


INGREDIENTS:
instant yeast - 1 tsp
sugar - 1 and a half tbsps
warm milk - 1/2 cup
egg, lightly beaten - 1
flour - 2 cups
unsalted butter, softened - 3 tbsps
salt - 3/4 tsp
minced garlic - 1 tsp
chili flakes - 1/2 tsp (optional)
italian seasoning - 1 tsp


for the garlic butter:
butter - 4 tbsps
garlic, minced - 1 tsp
italian seasoning - 1 tsp


PROCESS:
  •  In a bowl, mix together the yeast, sugar and milk.  
  • Add in the salt, egg, chili flakes, garlic, italian seasoning and flour. 
  • You can mix with a big spoon or you can use your stand mixer with the dough hook.
  • Mix well for a few minutes. DO NOT add in more flour because it is sticky. it will be okay once we add in the butter.
  • Once the mixture has come together add in the butter and mix further. 
  • Mix till the dough comes together and no longer sticks to the spoon and bowl. 
  • Cover with a cling wrap and keep it in a warm place and leave it to double in size. About 90 minutes.
  • After the dough has doubled, we can start working on it.
  • Lightly flour the work surface with and drop your dough on it.
  • Gently flatten the dough with your palms and form a circle.
  • Divide the circle into 2.
  • Divide each half into 5 pieces. So totally you have 10 garlic knots.
  • Take each dough and roll it into  a long strip.
  • Make a knot and tuck the ends underneath the knot.
  • Do the same for the rest of the dough balls.
  • Take a baking tray lined with parchment paper and place the knots in it. (remember to take a pan big enough to fit the 10 knots.) leave some gap between each knot to give it some room to rise.
  • Cover it loosely with the cling wrap and let it rise for another 30 minutes.
  • In the meantime, make the garlic butter and preheat the oven at 180 degrees.
  • Place the butter, garlic and italian seasoning in a bowl and melt it in the microwave. Keep it ready.
  • After the second rise, brush the knots with garlic butter and bake them in the oven for 18 to 20 minutes or until the tops become golden brown.
  • Brush them again with the remaining garlic butter once they come out of the oven.
  • Serve warm.

Printfriendly